2013年2月24日日曜日

active support 便利関数 try

関連テーブルのフィールド情報を取りにいくとき、関連テーブルが無いとき例外が発生しますようね。

   Image.all{|image|
                 image.book.title
          }
関連するbookが無い場合例外が発生。今までは以下のようにしていました。

   Image.all{|image|
                 image.book.title if image.book.present?
          }
tryを使うと少ないコードですみます

   Image.all{|image|
                 image.book.try(:title)
          }
かなりいいです。感動!

param情報にもつかます。
paramのハッシュ:search の中の:locationNmaにアクセスするとき
params["search"]["locationName"] if params["search"].present?

tryを使うと
params["search"].try(:[],:locationName)

いい感じです。

今日の葛城山

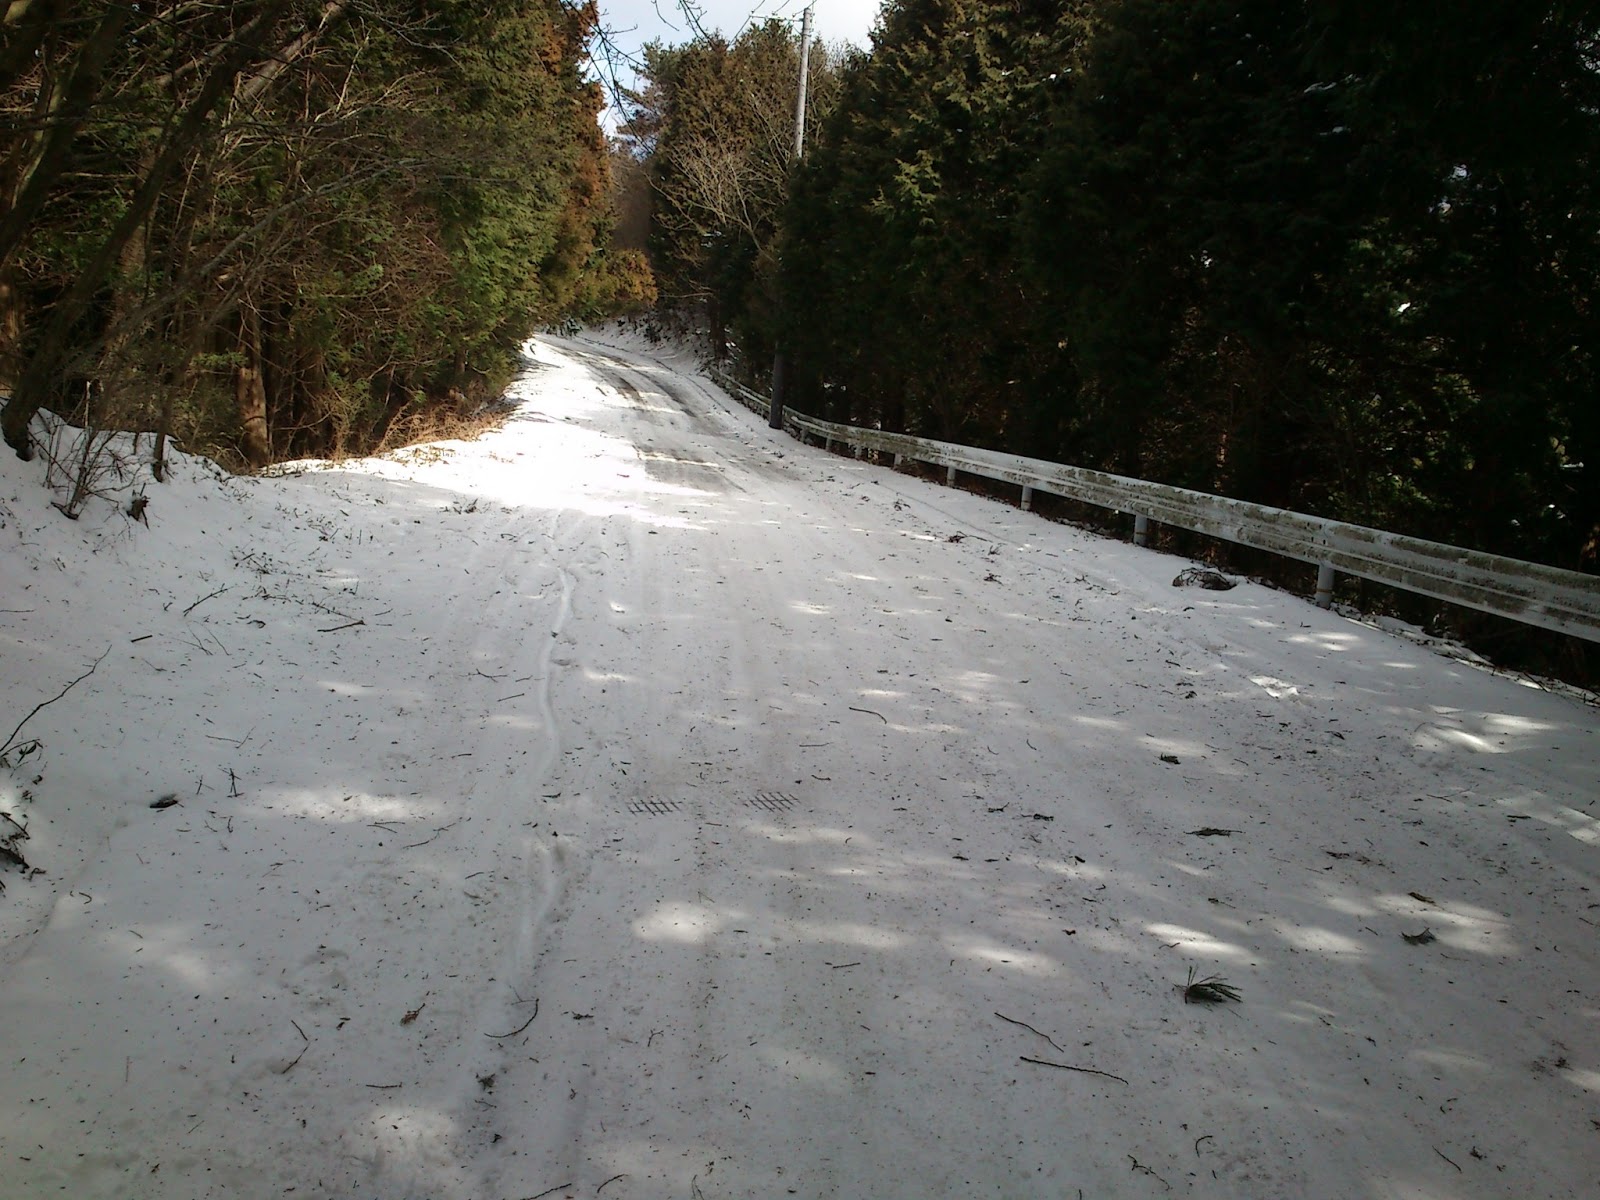
今日はハイランドパークから上はアイスバーンでした。そして、いつものコンクリートの坂から頂上まではほぼ歩かないと進めないアイスバーンした。こんな状況にも関わり無く、自転車で山に登ってきている野郎は4名いました。山頂温度は少し暖かくなって0度でした。


2013年2月17日日曜日

JQuery1.9ではまる

jQuery.browser(),.live() .die()が1.9から廃止されたんですね。


"ローカルではエラーも無く動作するのに、サーバーではjQuery関係のエラーが発生"この問題を解決するのに半日ほどかかりました
なかなか原因がつかめなかった理由はローカルのjQueryは1.8系でサーバーを1.9を使ってしまった為です。最初はjQueryを含めたライブラリのインストールが正しく出来ていないかも?からはじまりました。
長く辛い時間でした。
サーバーは最近インストールしたので、何も考えなく当然のように1.9.1を入れていました。最終的に解決方法はサーバーのjQueryのバージョンを1.8の最終にしました。
理由は廃止された関数を使っている部分のコードを変更するのは危険と判断したためです。

2013年2月10日日曜日

Homebrew(macのパッケージ管理) rbenv(rubyのバージョン管理) railsのインストール

私も遂にMacportとrvmにさよならして、Homebrewとrbenvをインストールしました

基本的にはここを参照しました
Homebrewのインストール
1.Xcodeのインストール
2.XcodeのCommandLineToolsのインストール(Xcode Preferences Downloads ConnamdLineTools
3.Homebrewのインストール
ruby <(curl -fsSkL raw.github.com/mxcl/homebrew/go)
4.MacPortsのアンインストール
sudo port -f uninstall installed
5.macportの設定を削除
sudo rm -rf /opt/local /Applications/DarwinPorts /Applications/Macports /Library/LaunchDaemons/org.macports.* /Library/Receipts/DarwinPorts*.pkg /Library/Receipts/MacPorts*.pkg Library/StartupItems/DarwinPortsStartup /Library/Tcl/darwinports1.0 /Library/Tcl/macports1.0 ~/.macports
6.環境変数の編集
削除
Macport関係の設定を削除
7.設定の再読み込み
 source ~/.profile
 source ~/.bash_profile
or
再ログイン
8.brew が正しくインストールされているかを確認
brew doctor
ここでのメッセージを元に悪いところを修正 rbenvのインストール
1.rvmが入っている場合は削除
rvm implode
2.rbenv とruby-buildのインストール
 brew install rbenv
 brew install ruby-build
 echo 'eval "$(rbenv init -)"' >> ~/.bash_profile
 source ~/.bash_profile
3.readlineのインストール
brew install readline
brew link readline
4.opensslのインストール
brew install openssl
brew link openssl
5.rubyのインストール(CONFIGURE_OPTSを設定しないとインストール出来ない)
CONFIGURE_OPTS="--with-readline-dir=/usr/local --with-openssl-dir=/usr/local" rbenv install 1.9.3-p194
rbenv rehash
rbenv global 1.9.3-p194
6.バージョン確認(バージョンが出るか確認してください)
rbenv version
ruby -v
7.ruby on rails のインストール
rbenv exec gem install rails
rbenv rehash
source ~/.bash_profile

その他
発生した問題と解決策
問題:bundle install で Gem::RemoteFetcher::FetchError になる
  gem update --system
 問題:rbenvでインストールするとbundleが入っていない?
  gem install bundle でインストール
問題:ビルド時のエラー
  以下からgccパッケージをダウンロードしてインストール
https://github.com/kennethreitz/osx-gcc-installer/downloads
問題:brew doctorでパス変更の要求
  /etc/pathsを変更して対応

2013年2月9日土曜日

葛城山 −3度

今日も葛城山に登ってきました。ハイランドパークまでは全く雪は有りませんでしたが、ハイランドパークを過ぎたあたりからところどころにアイスバーン。コンクリートの激坂の始まり付近から本格的に凍っている。そこから山頂までは半分ほど歩きました。
コンクリートの坂付近
コンクリートの坂付近

山頂


山頂

山頂

山頂の温度−3度
二週間前は-3度、一週間前は9度、そして今日は-3度気温が戻りました。


2013年2月3日日曜日

rails3 複数ファイルのアップロード

ポイントはinput にmultiple属性の追加とinput のtype="file"でファイルを選択終了するとjavascriptで新しいinput type="file"を作るです。サンプルはこちら
新規作成中の画面
編集中の画面


ファイル選択ボタンを押す毎に新しいファイル選択ボタンの作成をしています
 
新規作成用
<%= form_for(@book,:html => {:multipart => true}) do |f| %>
  <% if @book.errors.any? %>
    

<%= pluralize(@book.errors.count, "error") %> prohibited this book from being saved:

    <% @book.errors.full_messages.each do |msg| %>
  • <%= msg %>
  • <% end %>
<% end %>
<%= f.label :title %>
<%= f.text_field :title %>
<%= hidden_field_tag("imagenum",'',{:class => :imagenum}) %>
<%= f.submit %>
<% end %>
編集用
<%= form_for(@book,:html => {:multipart => true}) do |f| %>
    <% if @book.errors.any? %>
        

<%= pluralize(@book.errors.count, "error") %> prohibited this book from being saved:

    <% @book.errors.full_messages.each do |msg| %>
  • <%= msg %>
  • <% end %>
<% end %>
<%= f.label :title %>
<%= f.text_field :title %>
<% @book.images.each do |image| %> <%= check_box_tag "images[]",image.id,true %><%= image.filename %> <% end %> <%= hidden_field_tag("imagenum",'',{:class => :imagenum}) %>
<%= f.submit %>
<% end %>
これではわかりにくいと思うのでgithubにサンプルをアップしました localhost:3000/booksあたりからアクセスしてください

2013年2月2日土曜日

centOSにrailsのインストール

いつもこの設定をするのに時間がかかるので、メモしておきます

centOSにrails,passengerのインストール手順(前提条件としてはアッパチはインストールしている)
1.インストール いろいろインストールしておかないとpassengerをインストールすときにエラーがでる。(多分この程度でいけると思う)
# yum -y install  readline-devel.x86_64
# yum -y install  zlib-devel.x86_64
# yum -y install sqlite-devel
# yum -y install curl 
# yum -y install curl-devel 
# yum -y install openssl-devel
# yum -y install httpd-devel openssl openssl-devel apr-devel 
2.rubyのインストール
# bash -s stable < <(curl -s https://raw.github.com/wayneeseguin/rvm/master/binscripts/rvm-installer )
# source /etc/profile.d/rvm.sh
//一応1.9.3をインストール
# rvm install 1.9.3
# gem install rails
# gem install passenger
# passenger-install-apache2-module
  途中に出てくるLoadModule.....をメモしておく
3.railsプロジェクトをサーバーにコピー
3.1Gemfile のtherubyracer のコメントを外す
3.2/var/www/railsにプロジェクトをコピー
   例:storeの場合  /var/www/rails/store 
3.2シンボリックリンクを張る
   例:storeの場合
   cd /var/www/html/rails  
   ln -s /var/www/rails/store/public store
4.http設定ファイルの追加
/etc/httpd/conf.d/rails.confを作成
  *3でメモした物を貼付ける
  *RailsBaseURIをセットする
  例:storeの場合
    
     LoadModule passenger_module /usr/local/rvm/gems/ruby-1.9.3-p374/gems/passenger-3.0.19/ext/apache2/mod_passenger.so
     PassengerRoot /usr/local/rvm/gems/ruby-1.9.3-p374/gems/passenger-3.0.19
     PassengerRuby /usr/local/rvm/wrappers/ruby-1.9.3-p374/ruby

     RailsBaseURI /rails/sotre
     
     注意:LoadModule以降の内容は環境によって違います。
5.コンパイル
bundle install
rake db:migrate RAILS_ENV=production
rake assets:precompile
6.SSL証明書作成
# cd /etc/pki/tls/certs 
# make server.key 
umask 77 ; \
/usr/bin/openssl genrsa -aes128 2048 > server.key
Generating RSA private key, 2048 bit long modulus
......................................................++++++
.............++++++
e is 61251 (0x10001)
Enter pass phrase:# パスフレーズ設定
Verifying - Enter pass phrase:# 再入力
# 秘密鍵からパスフレーズを削除
# openssl rsa -in server.key -out server.key 
Enter pass phrase for server.key:# パスフレーズ入力
writing RSA key
#
# make server.csr 
umask 77 ; \
/usr/bin/openssl req -utf8 -new -key server.key -out server.csr
You are about to be asked to enter information that will be incorporated
into your certificate request.
What you are about to enter is what is called a Distinguished Name or a DN.
There are quite a few fields but you can leave some blank
For some fields there will be a default value,
If you enter '.', the field will be left blank.
-----
Country Name (2 letter code) [XX]:JP# 国
State or Province Name (full name) [e]:OSAKA   # 地域(県)
Locality Name (eg, city) [Default City]:OSAKA# 都市
Organization Name (eg, company) [Default Company Ltd]:ABC   # 組織名
Organizational Unit Name (eg, section) []:develop   # 組織の部門名
Common Name (eg, your server's hostname) []:www.hillclimb.com   # サーバーのFQDN
Email Address []:xxx@hillclimb.com# 管理者アドレス
Please enter the following 'extra' attributes
to be sent with your certificate request
A challenge password []:# 空Enter
An optional company name []:# 空Enter
#
# openssl x509 -in server.csr -out server.crt -req -signkey server.key -days 3650 # 有効期限が10年の自己署名証明書を作成
Signature ok
subject=/C=JP/ST=Hiroshima/L=Hiroshima/O=GTS/OU=Server World/CN=www.hillclimb.com/emailAddress=xxx@hillclimb.com Getting Private key
# chmod 400 server.*

//これをしないとアパッチ起動時にパワードを聞かれる
# cp -p server.key server.key.org
# openssl rsa -in server.key.org -out server.key
7.ssl インストールと設定
# yum -y install mod_ssl
# vi /etc/httpd/conf.d/ssl.conf
# 77行目:行頭の#を削除
DocumentRoot "/var/www/html"
# 78行目:#を削除しサーバー名指定
ServerName www.server.world:443
# 105行目:証明書指定
SSLCertificateFile /etc/pki/tls/certs/server.crt
# 112行目:鍵ファイル指定
SSLCertificateKeyFile /etc/pki/tls/certs/server.key

8.ファイヤーウオールで443を開ける
9.アパッチの再起動
10.アクセス  https://www.hillclimb.com/rails/store
  このときにpassengerでエラーが出る事があります。そのときはアパッチのログやrailsプロジェクトのログをみれば大抵何が悪いかわかります。それでもわからない時はdevelopmentの設定を使って起動してみてください。多分問題は無く起動します。そこでどの設定が関係しているかを順番に潰していく方法かな。。

今日の葛城山

今日も葛城山に登ってきました。
かなり暖かいです。自転車乗りのシーズン到来を肌で感じました。先週の葛城山の気温が-3度で今日の温度はなんと9度でした。一週間で12度の違い。どうなっている??

今日の山頂はガスだらけでした


9度です。

railsパス2

やはりダイレクトにパスを入れたら大変厄介な事になります。railsプロジェクト内のpublicがアパッチのドキュメントルートに設定されているうちは問題は発生しませんが、http://www.XXX.XXX/books  <==これは問題ない
http://wwwXXX.XXX/YYY/books  <==YYYの部分が変わるので、YYYの部分を意識しなければならない。rails関数を使えば自動でやってくれるので、出来るだけrails関数を使った方がコードが少なくなります。

以下の様なルーティング定義をroutes.rbに書き込むと、その下に表示されているような関数が来ます。出来るだけそれを使った方が無難です。注意:関数名の最後は_path or _urlです
  resources :posts do
    resource :comments do
    end
  end
$rake routes

post_comments POST           /posts/:post_id/comments(.:format)      comments#create
 new_post_comments GET    /posts/:post_id/comments/new(.:format)  comments#new
edit_post_comments GET    /posts/:post_id/comments/edit(.:format) comments#edit
                                   GET    /posts/:post_id/comments(.:format)      comments#show
                                   PUT    /posts/:post_id/comments(.:format)      comments#update
                                DELETE /posts/:post_id/comments(.:format)      comments#destroy
                         posts GET    /posts(.:format)                        posts#index
                                 POST   /posts(.:format)                        posts#create
                  new_post GET    /posts/new(.:format)                    posts#new
                  edit_post GET    /posts/:id/edit(.:format)               posts#edit
                          post GET    /posts/:id(.:format)                    posts#show
                                  PUT    /posts/:id(.:format)                    posts#update
                               DELETE /posts/:id(.:format)                    posts#destroy
パスチップス1 コメント新規作成に関してはtype1とtype2は同じ paramsは:post_id と:comment=>{}が入っています。結構便利です。
type1:
<%= form_for([@post,@post.comments.build]) do |f| %>

type2:
<%= @post.comments %>
<%= @comment = Comment.new %>
<%= form_for([@post,@comment]) do |f| %>
パスチップス2 editに関しては上下は同じです
<%= form_for(@comment,:url =>{:action =>"update",:controller => "comments"}) do |f| %>
or
<%= form_for(@comment) do |f| %>
パスチップ3 以下の上下は同じですが、edit_XXXの方は追加情報を加える事が出来ます。
    <%= link_to 'Edit', edit_post_comments_path(@post,comment,:abc => "ddddd") %>
<%= link_to 'Edit', [:edit,@post,comment] %>
結果として[@post,@comment]形式はform_forの時つかって、link_to ではroutes.rbで作られる関数をりようすするといいような気がします。


railsの場合はレールに乗ったらコードは大変少なくなります。レールに乗りましょう。
レールに乗る為に最近注意している点は以下です。
1.DBと関係なくても出来るだけモデルを作る(理由:検証が簡単に追加出来し、エラー表示部分も連動してくれる)
2.遷移に関してはroutes.rbで作られる関数を利用。url_forでは表現出来ないパスがある
3.深くならない限り、パスのネストを使う(理由:親IDをsession等に覚えている必要が無く、パスだけで関連が想像出来る)
4.リスト表示の部分は出来るだけ部分テンプレートで書く。(理由:検索処理などを直にajax対応出来る)